How to Setup SSH Authentication for Github
Table of Content
Why do We Need SSH keys?
In my last post I explained why it is important to structure our work as data scientists. One of the recommendation was to create a Github account in order to version control our work. The default authentication to access a repository in order to perform various operations like cloning or pushing changes is through a user name and a password. However I believe using SSH keys is safer (even though this point is debated on the internet), but also more importantly it makes our lives simpler (if like me you are lazy and don’t want to enter your credentials every time you’ll like this new method). As a junior analyst they kind of looked intimidating to me in the past, but once I set one up I quickly realized it wasn’t that scary. In addition, while simple, it’s also a valuable skill to know how to use SSH keys as they can be used in various contexts like accessing a remote server for instance.
Without further ado, let’s create a SSH key to use in our Github account.
Setting Up SSH Authentication Step by Step
1. Create a SSH key pair.
Open the terminal and enter the following, then follow the instructions:
    ssh-keygen -t rsa -b 4096 -C "name-of-your-keys"
    # The -C argument is optional, it simply identifies your key in case you
    # have several of them. Can be anything like an email for instance.
This process creates 2 files, id_rsa and id_rsa.pub, in the ~/.ssh/ folder (the ‘.’ in front of ‘ssh’ means it’s a hidden folder, type cd ~/.ssh/ && ls -la to explore the folder in your terminal). Now, never share the id_rsa file, this is your private secret key. Services like Github or remote servers only need the public id_rsa.pub in order to authenticate you.
Still in the terminal, copy the public key as we will need it to tell Github how to authenticate your computer.
    # Linux
    xclip -sel clip < ~/.ssh/id_rsa.pub

    # Mac
    pbcopy < ~/.ssh/id_rsa.pub
2. Add the key to Github
Head over to https://github.com and access the SSH page in your settings, as follow:
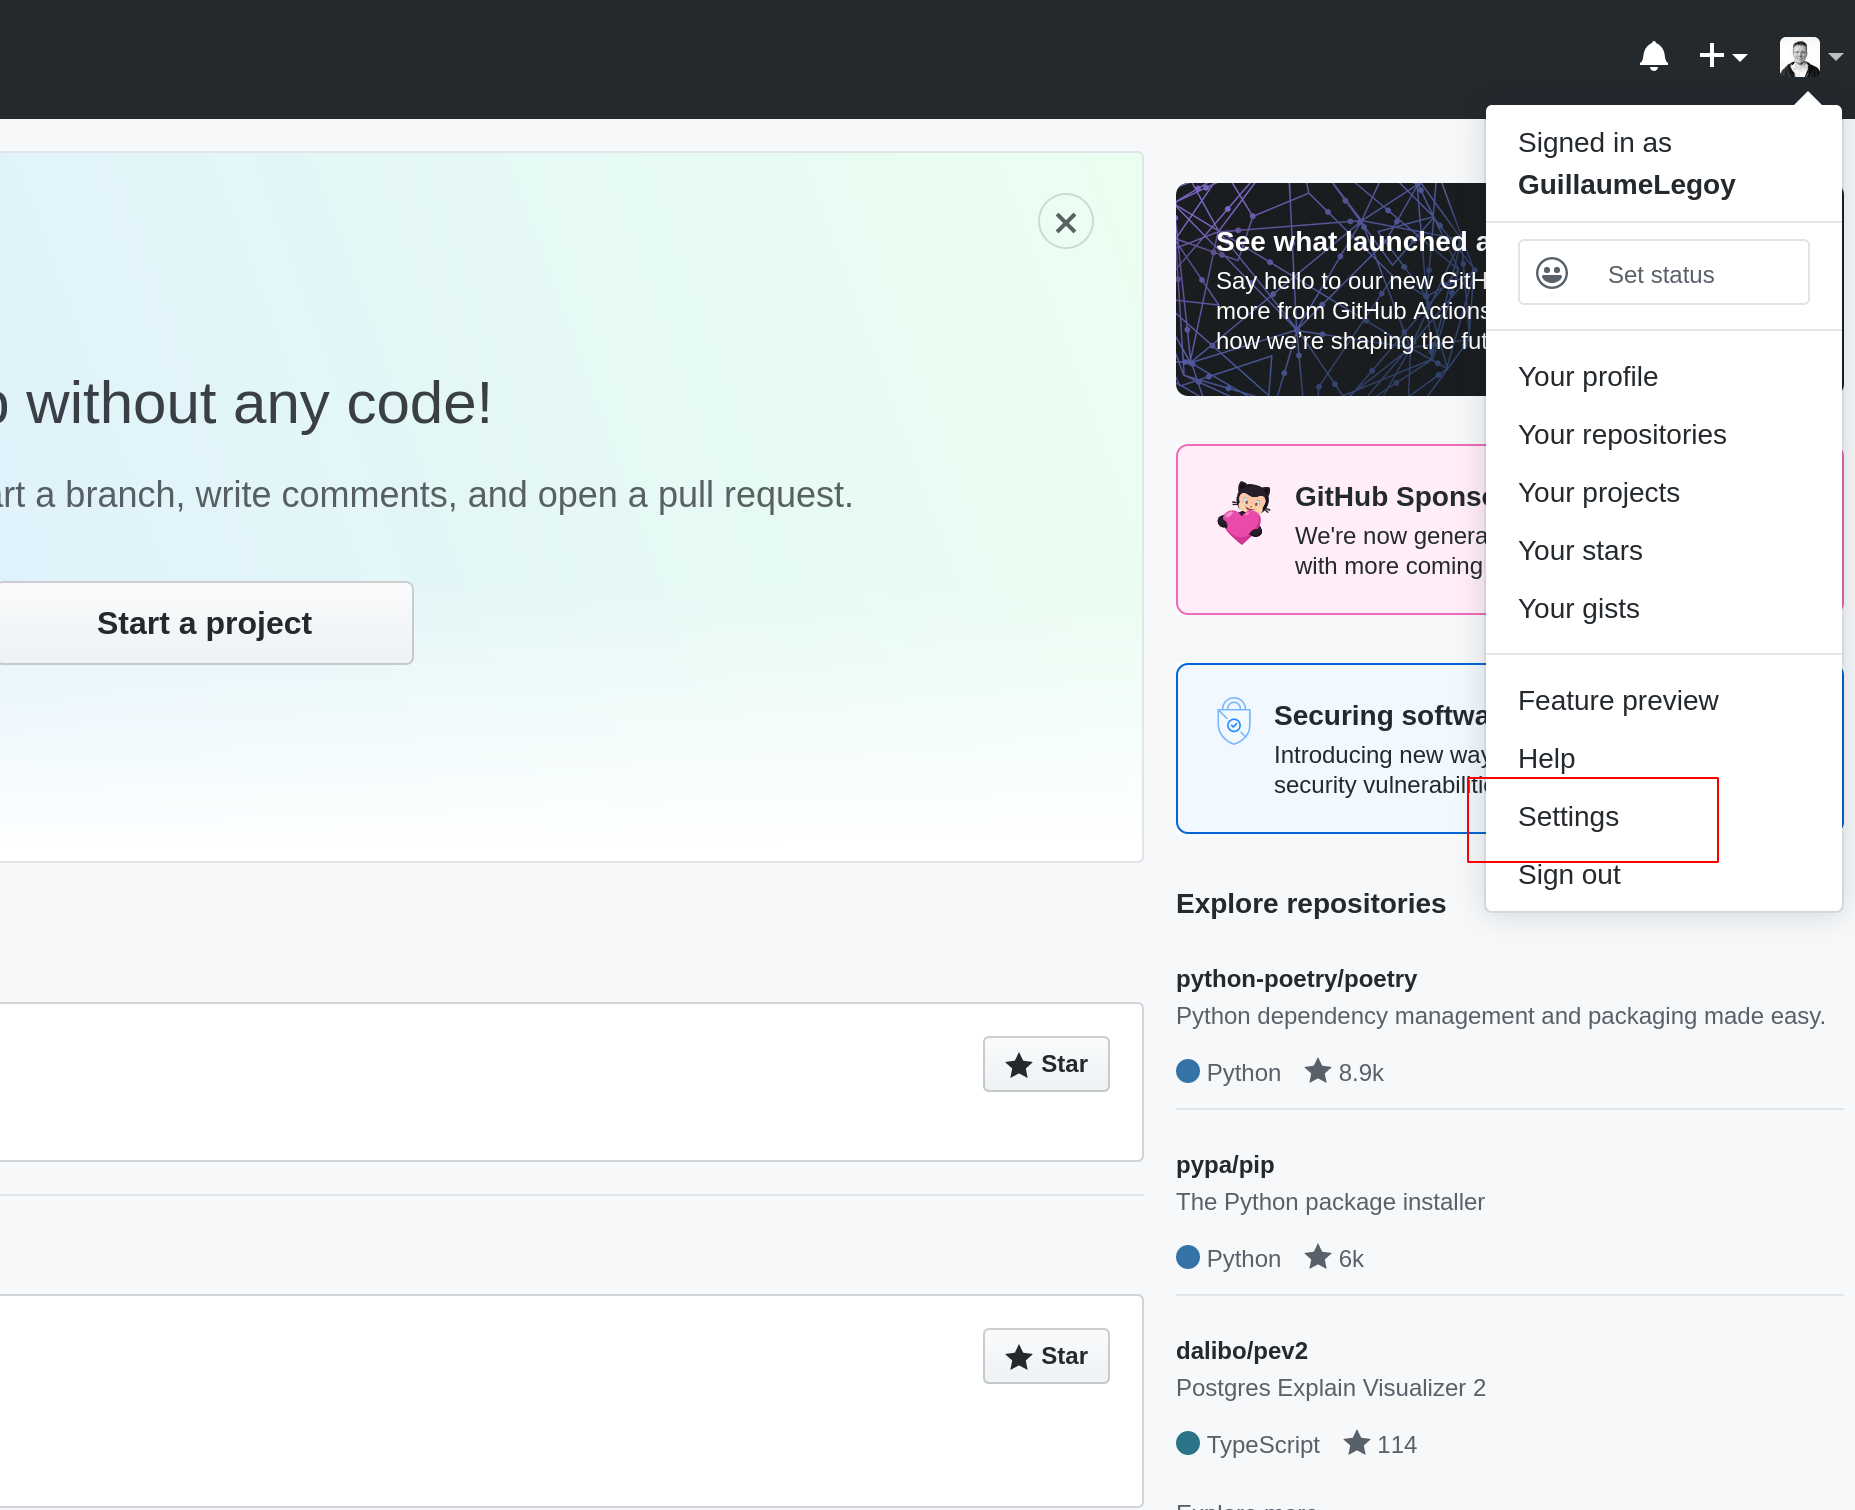
then
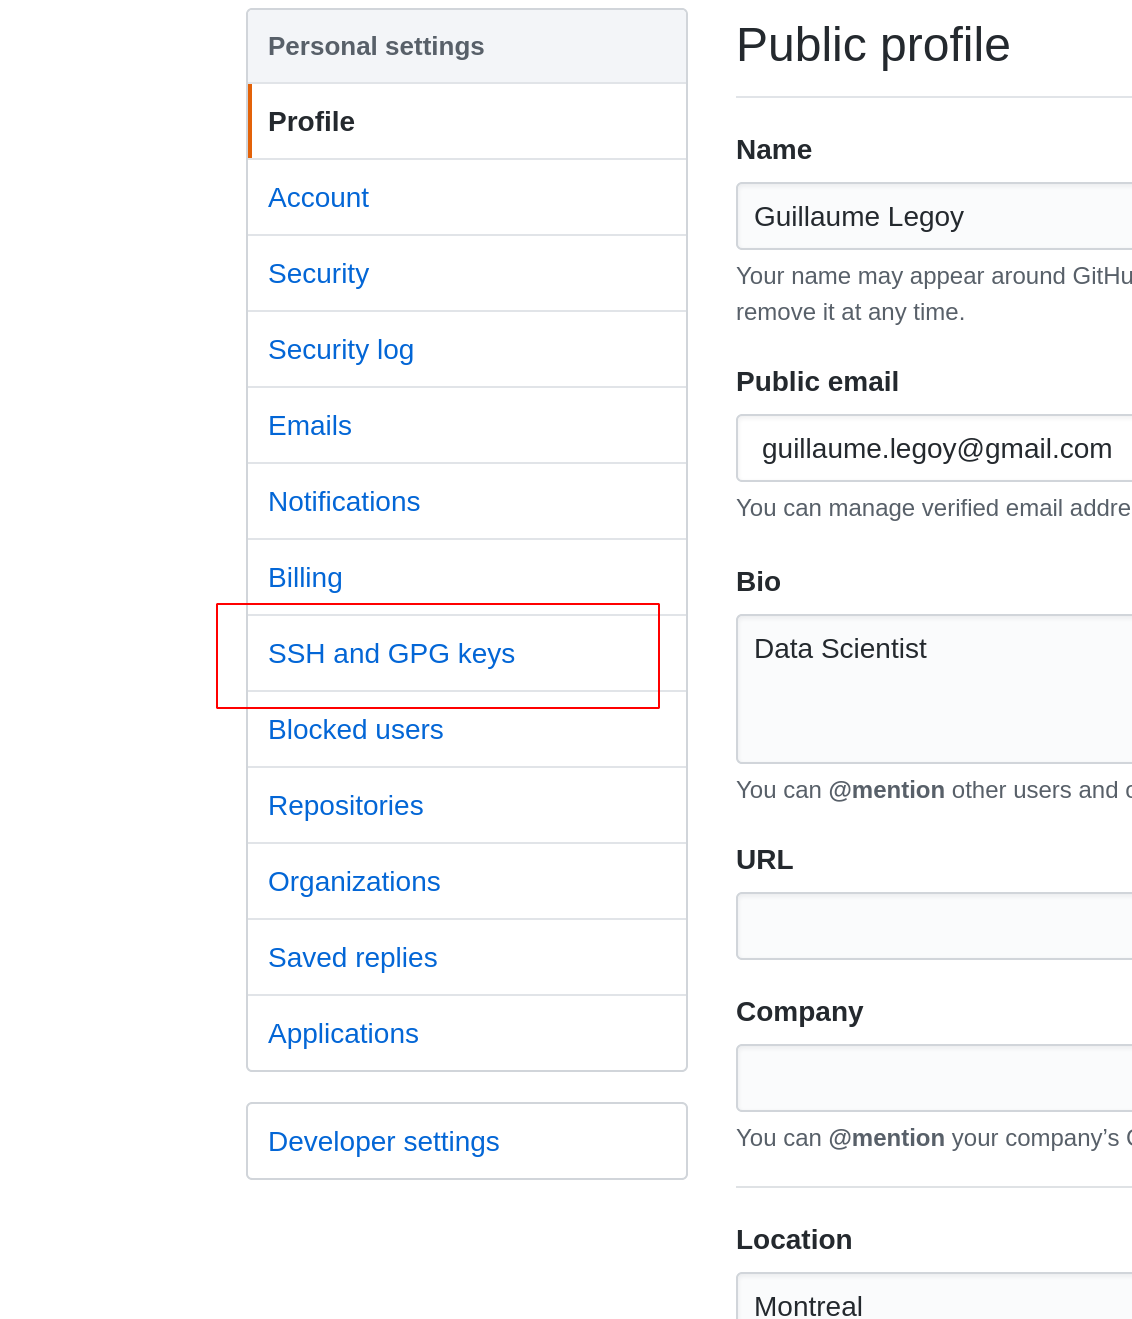
and finally

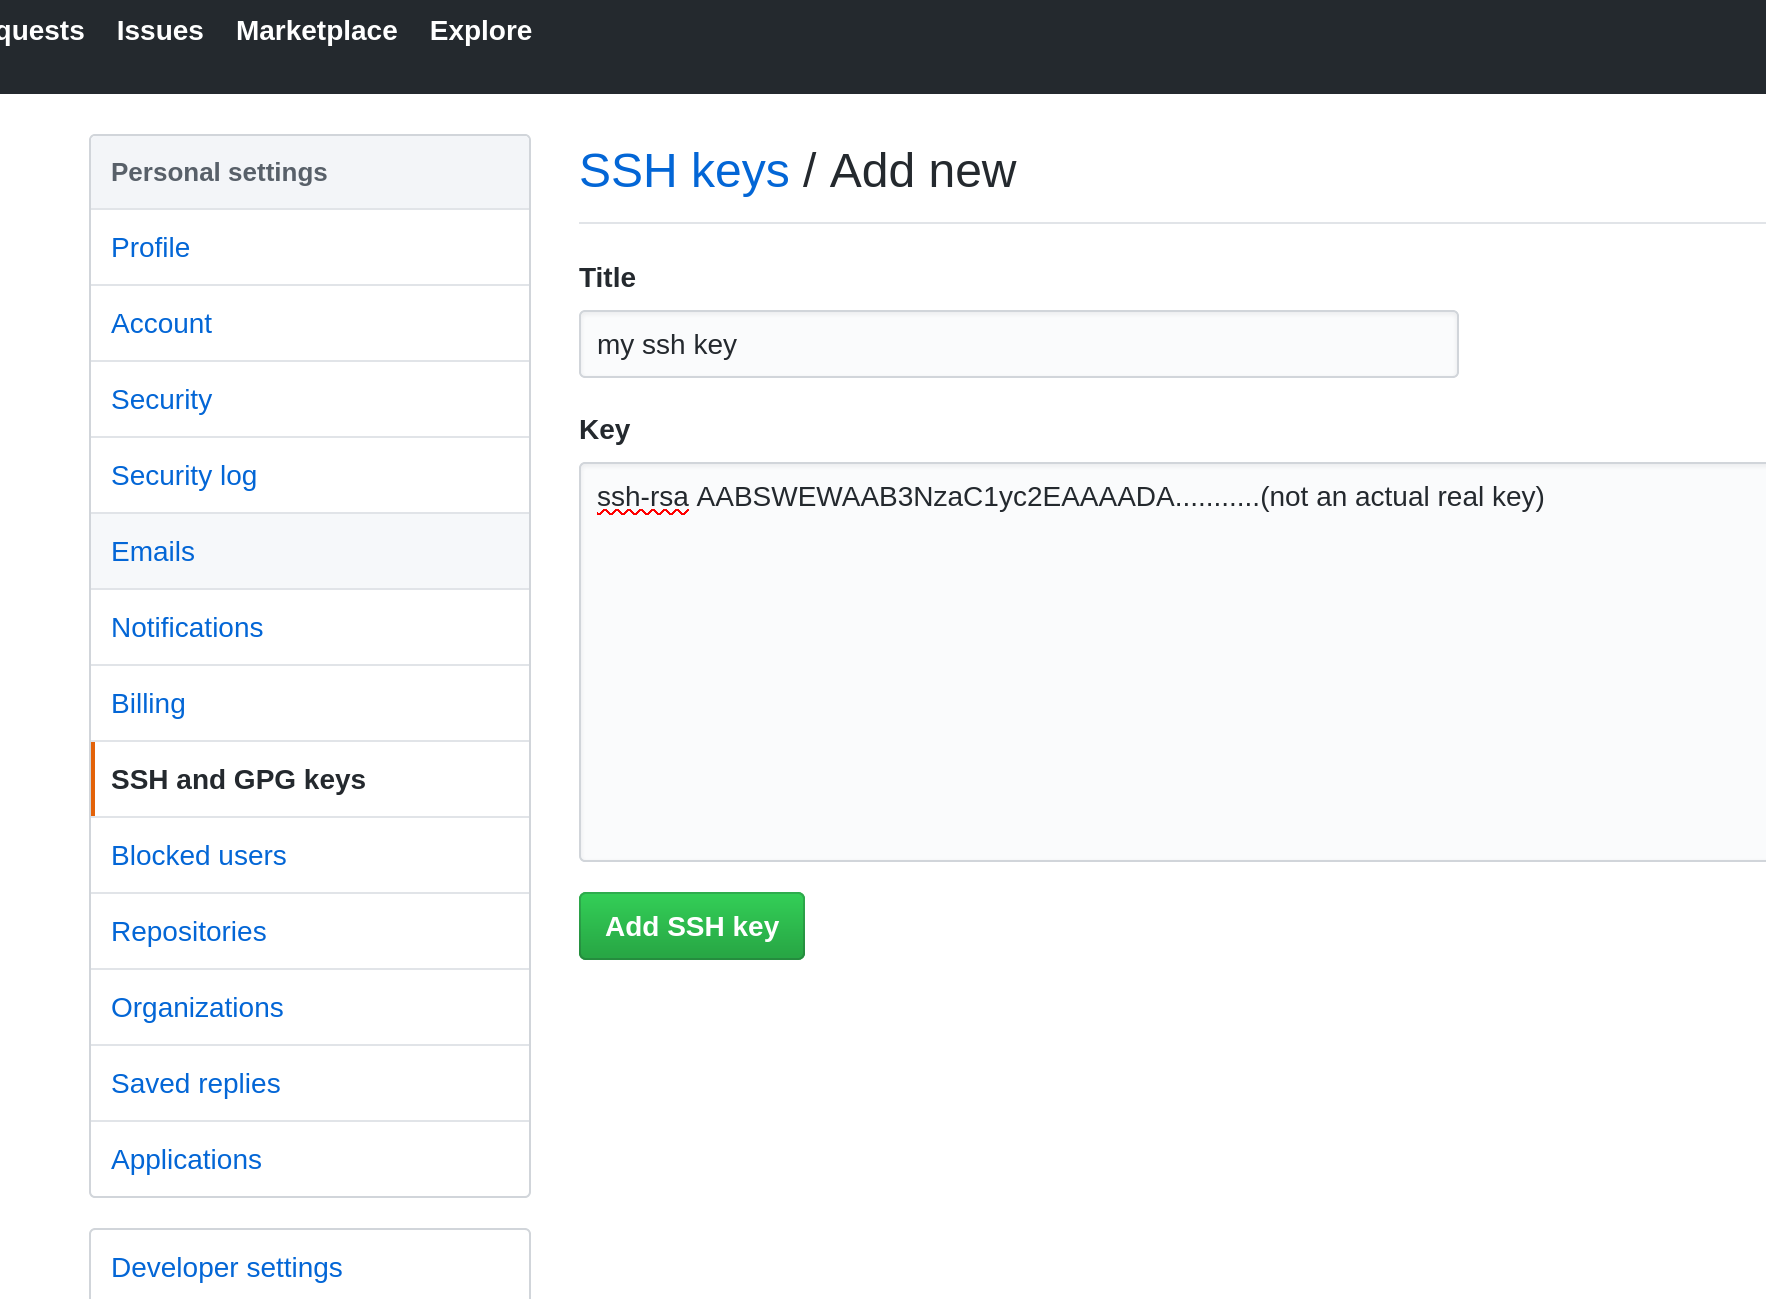
Click the green button ‘New SSH key’ and configure your key:
Here simply give a name to your key and paste the public key we copied above.
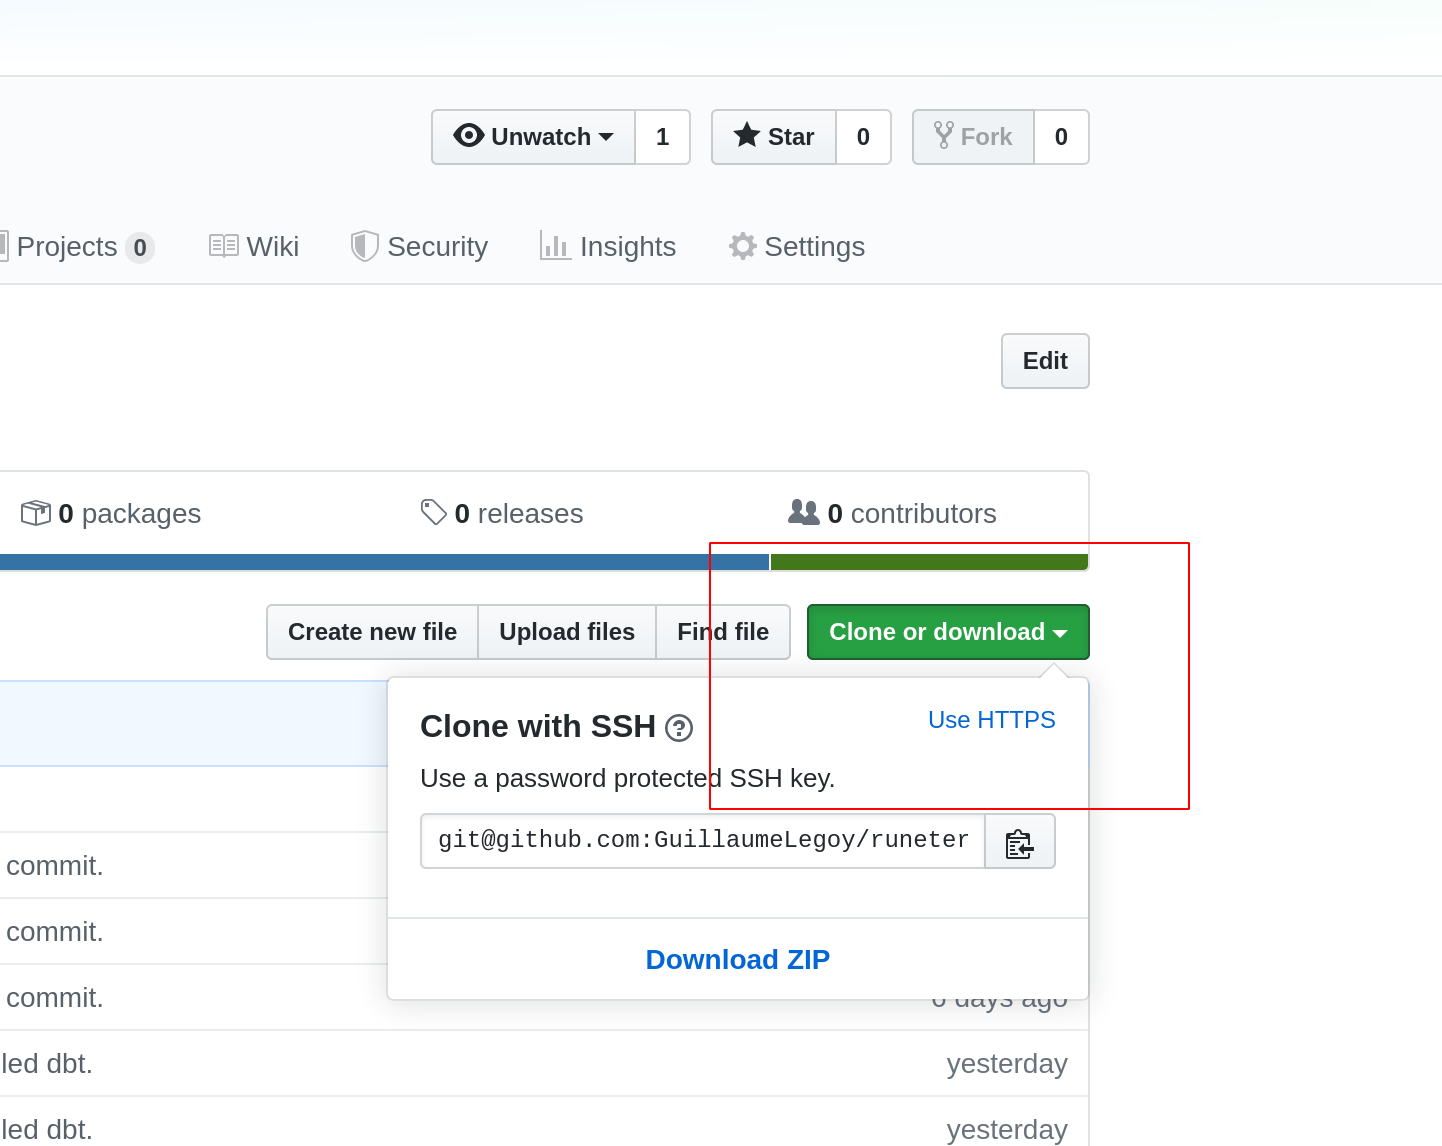
That’s it we are done great job! Now you can start cloning your repositories using the SSH link (see screenshot below) instead of the https one. When you clone, pull or push changes you won’t need to enter your login and password anymore, Github will directly match your public and private key and authorize you to connect to your repository. I believe this is way simpler to use.
Finally, in case you have an existing local repository on your computer, you’ll need to change the remote link to now use SSH instead of HTTPS.
3. (Optional) Change the remote link from HTTP to SSH
First step head over to your repository in Github and copy the repository clone link as follow (copy the SSH one not the HTTP):
Then in your terminal:
  cd ~/path/to/your/repo
  # Use your repository path on your local computer here

  git remote set-url origin git@github.com:UserName/RepoName.git
  # Here replace the git link with the one we just copied on Github

  git remote -v
  # You are done, this last step is to check if the remote is properly set
  # This step should show you 2 lines containing your repo name as copied above.
Happy coding!